SignalWire AI Agent - Node.js
Artificial Intelligence platforms are increasingly popular and constantly evolving tools that you can leverage when building a Voice application. The SignalWire AI Agent, currently integrated with OpenAI, was developed to simulate natural conversations. An AI agent allows businesses to automate routine tasks, handle high volumes of inquiries, provide instant support 24/7, and offer consistent and accurate information to customers.
Start with a simple prompt for the AI agent:
You are the CEO's assistant. Your job is to answer calls to the CEOs office. The CEO is not available. Gather a name and message for each caller so that the CEO can get back to them.
The SignalWire AI Agent will turn that into a conversational interaction with the caller:
Agent: "Hello, thank you for calling the CEO's office. How may I assist you today?"
Human: "Can I talk to the CEO?"
Agent: "I'm sorry. The CEO is not available, but I can take a message."
Human: "OK. Can you have him call John back at 555-123-1234?"
Agent: "OK, John. I will give the CEO your message and he will get back to you as soon as possible. Thank you for calling and have a nice day."
With a SignalWire AI Agent, you do not need to provide specific text for every possible scenario as with a traditional IVR. All you have to do is provide a role and simple guidelines and the AI agent can interact with callers dynamically. This can save you time not just with handling routine tasks, but also in the development of your call center.
This example implements a SignalWire AI Agent with the Compatibility SDK with Node.js. The Compatibility SDK allows you to programmatically build XML and send it to an API endpoint. Specifically, we will use the Compatibility API's <Connect> verb. You may use as many of the <AI> noun's attributes as you need to customize the agent for your application. See the complete demo application in the GitHub Repo.
Setup Your Environment
Start by setting your environmental variables. Copy the contents of env.example and save them in a new file called .env. Fill in your SignalWire credentials.
# Project ID copied from the API Credentials in your SignalWire Space
# Example: 7b98XXXX-XXXX-XXXX-XXXX-XXXXXXXXXXXX
PROJECT_ID=

# API token copied from the API Credentials in your SignalWire Space
# Example: PTda745XXXXXXXXXXXXXXXXXXXXXXXXXXXXX
API_TOKEN=

# Your SignalWire Space URL copied from the API Credentials in your SignalWire Space
# Example: spacename.signalwire.com
SPACE_URL=

# The URL of your deployed application, including the protocol extension
# Example: https://example.ngrok.app
HOST_APP=

# 10-digit phone number for a sales department in e.164 format
# Example: +12225550110
SALES_NUMBER=

# 10-digit phone number for a support department in e.164 format
# Example: +12225550112
SUPPORT_NUMBER=
If you need help finding your credentials, check out our guide to Navigating Your SignalWire Space. The application will pull these environmental variables from the .env file on bootstrap.
Run Your Express Server
This example serves our webhooks using an Express server. After your environmental variables are set, you can install dependencies with npm install then start the Express server with npm run start. If you prefer to use Docker, build the image with docker build -t aiagent . and run it with docker run --p 3000:3000 --env-file .env aiagent.
Testing with Ngrok
SignalWire requires that your webhooks be publicly accessible for them to be used with our services. So, we recommend using Ngrok to provide an HTTPS URL for testing. In your Ngrok CLI, run ngrok http 3000, where 3000 is the port we set in our Express server. It will return a secure URL you can copy for the next step. You will also add this URL to the .env file as the HOST_APP to build webhook URLs.
Configure a Number to Accept Incoming Calls
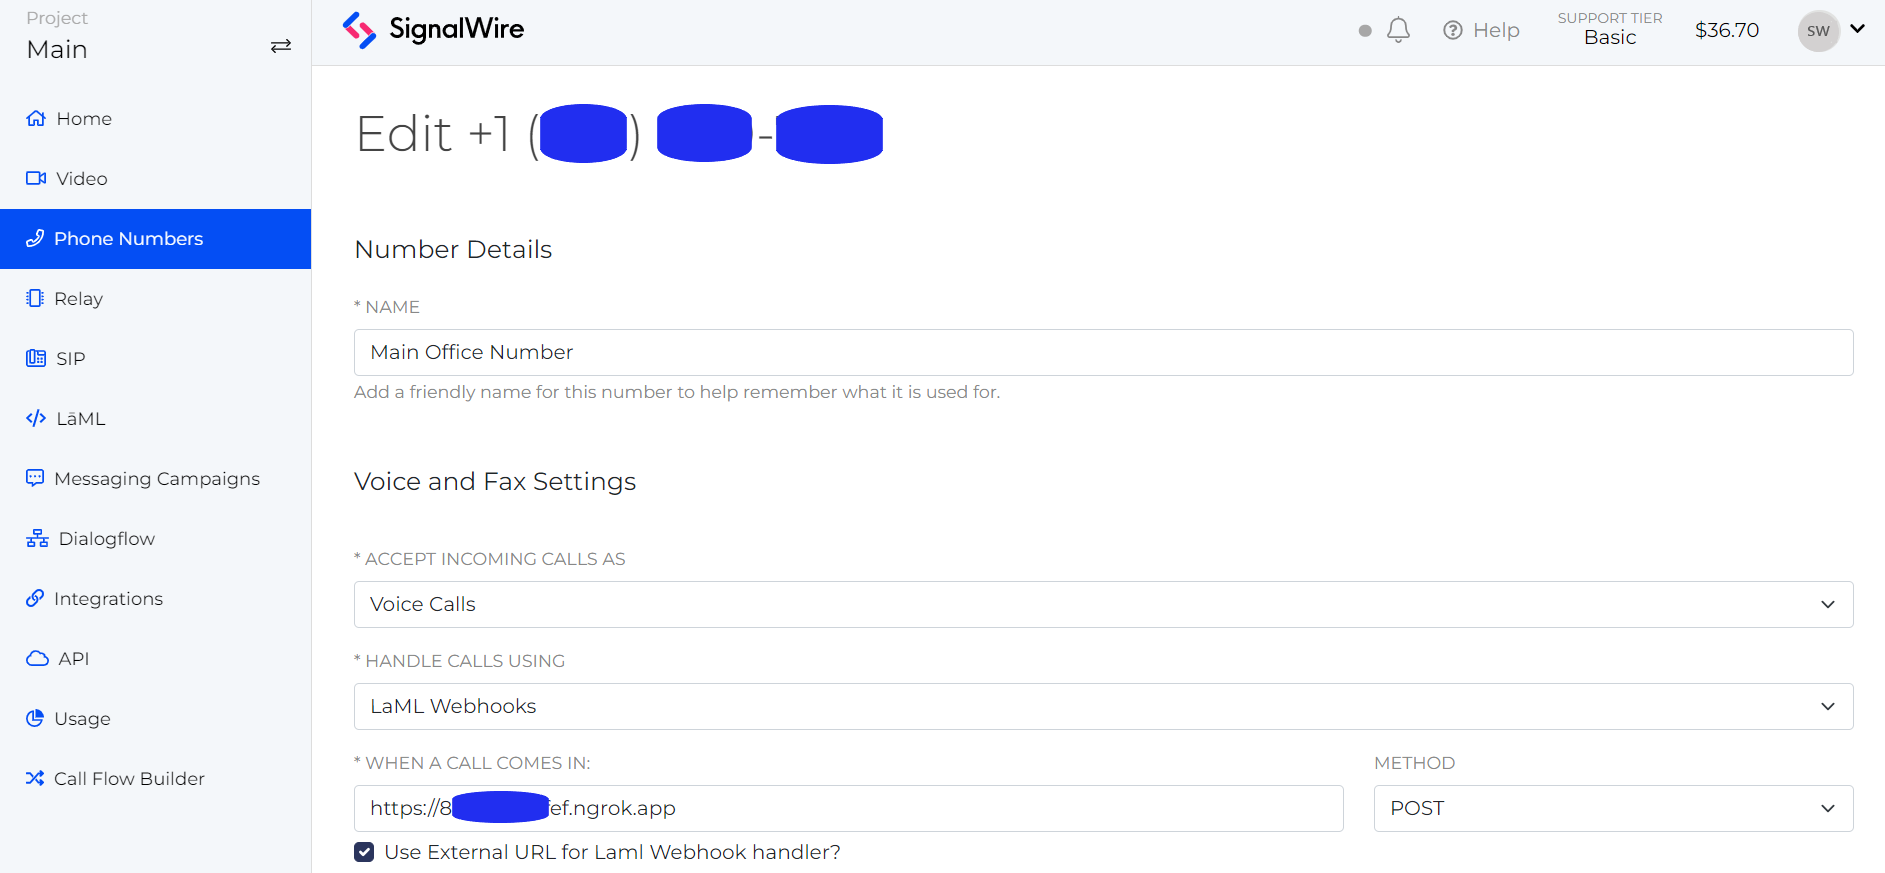
In your SignalWire Dashboard, you can purchase a phone number and edit its settings to direct calls to the Ngrok URL. The settings for your phone number of choice will look something like this:

With your server and Ngrok running, you should now be able to dial this number and test this example.
Code Walkthrough
In the index.js file of our repo, you will find four routes: a default entry route, a function route, a transfer route, and a summary route.
Default Route
When a call comes in, the default route initializes an AI agent with all of the information it will need for the conversation. There are a few notable steps here:
- We are building the XML and sending it with three lines that bookend the bulk of the handler logic.
const response = new RestClient.LaML.VoiceResponse();
// logic with XML verbs
res.set("Content-Type", "text/xml");
res.send(response.toString());
-
Initialize the AI agent with
connect.ai. When calling this method, you can pass an object with as many attributes as you would like to customize with. -
Give the AI agent its role with the
promptmethod. As withai, you can pass custom attributes as the first argument. The second argument will be all of the instructions the AI agent needs to interact with a caller.
You are the CEO's assistant.
Your job is to answer phone calls and collect messages or transfer the caller to a human agent.
The CEO is not available now. Offer to take a message or transfer the caller to live agent.
Request the caller's name.
You are able to transfer a call to support or sales.
Here is a list of departments that you can transfer the caller to: "Sales", "Support". Transfer the caller by using the appropriate function.
If the caller would like to leave a message for the CEO, ask for their message.
After collecting the message, do not wait for the user to end the conversation: say goodbye and hang up the call.
Be sure to hang up the call at the end of every conversation.
That is all you need to provide the AI agent to create an effective assistant. Although this prompt is not shared with callers, note we do not include any sensitive information in the prompt, as the AI agent may share any information it is given. The agent can transfer a call, but even the phone numbers are abstracted away from the AI inside our SWAIG function which we will discuss later.
-
The
postPromptallows you to gather information about the call after it is completed. In this example, we tell the AI to return a JSON object that can be parsed and easily accessed when it is returned to our final webhook. -
Finally, this route is also where you can define custom auxillary functions for your application with SignalWire AI Gateway (SWAIG) functions. These allow the AI agent to perform external actions (e.g., sending an SMS) or gather data (e.g., the current weather in a specific city). In this example, the AI can transfer the caller to one of the departments it was given in the prompt. You can add as many SWAIG functions as you like using the same pattern.
Function Route
The AI will call this route if the caller asks requests an external action that has been defined by a SWAIG function. For example, if you have SWAIG functions to look up weather, look up a local time, transfer a call, and send an SMS, the AI will respond to a caller's request for one of these services by calling this route with the appropriate function name in the request body. You can handle all of the functions in the same route with a switch that checks req.body.function, or you could choose to set a separate webHookURL for each function when you define SWAIG functions in the default route. See all of the parameters set to the webHookURL in the AI documentation.
For this example, the AI can only transfer a call. This is a multi-step process. We have given the AI a list of available departments, so it will pass the applicable department name to the function when a caller asks to be transferred to Sales or Support. Notice that we have specified that the agent should send the function argument as a JSON object. From the request body, we have the department name to pull a phone number from the .env file and a callSid to modify the current call. The function route builds a request with this information and sends it to the transfer route. If this function is successful, the AI agent will hang up.
Transfer Route
This is a helper route that will build XML and send it to the API to connect the caller with a new number.
Summary Route
The summary route receives final information from the AI agent in response to the postPrompt that was set in the default route. The request body contains a lot of information about the call from a full call log to the post_prompt_data which is the AI's answer to your post prompt. See all parameters in the technical reference.
A full call log may look something like this:
[
  {
    "role": "assistant",
    "content": "Hello, thank you for calling the CEO's office. How may I assist you today?"
  },
  { "role": "user", "content": "Can I talk to the CEO, please?" },
  {
    "role": "assistant",
    "content": "I'm sorry, but the CEO is not available at the moment. May I take a message or transfer you to a live agent?"
  },
  {
    "role": "user",
    "content": "Yes, I can leave a message. Can you have him call John back?"
  },
  {
    "role": "assistant",
    "content": "Thank you, John. I will make sure that the CEO receives your message and gets back to you as soon as possible. Have a great day! **assistant_hangup**"
  }
]
For our example, we directed the AI to send a JSON object with the caller's name and message or the message that the caller was transferred. The parsed JSON object returned from the conversation above is:
{
  "contact_name": "John",
  "message": "Please call John back at 425-666-4242."
}
We access this parsed data and console log it, but could to easily save it to a CSV, send it to another application, or some other further logic.
Using AI with XML Bins from your Dashboard
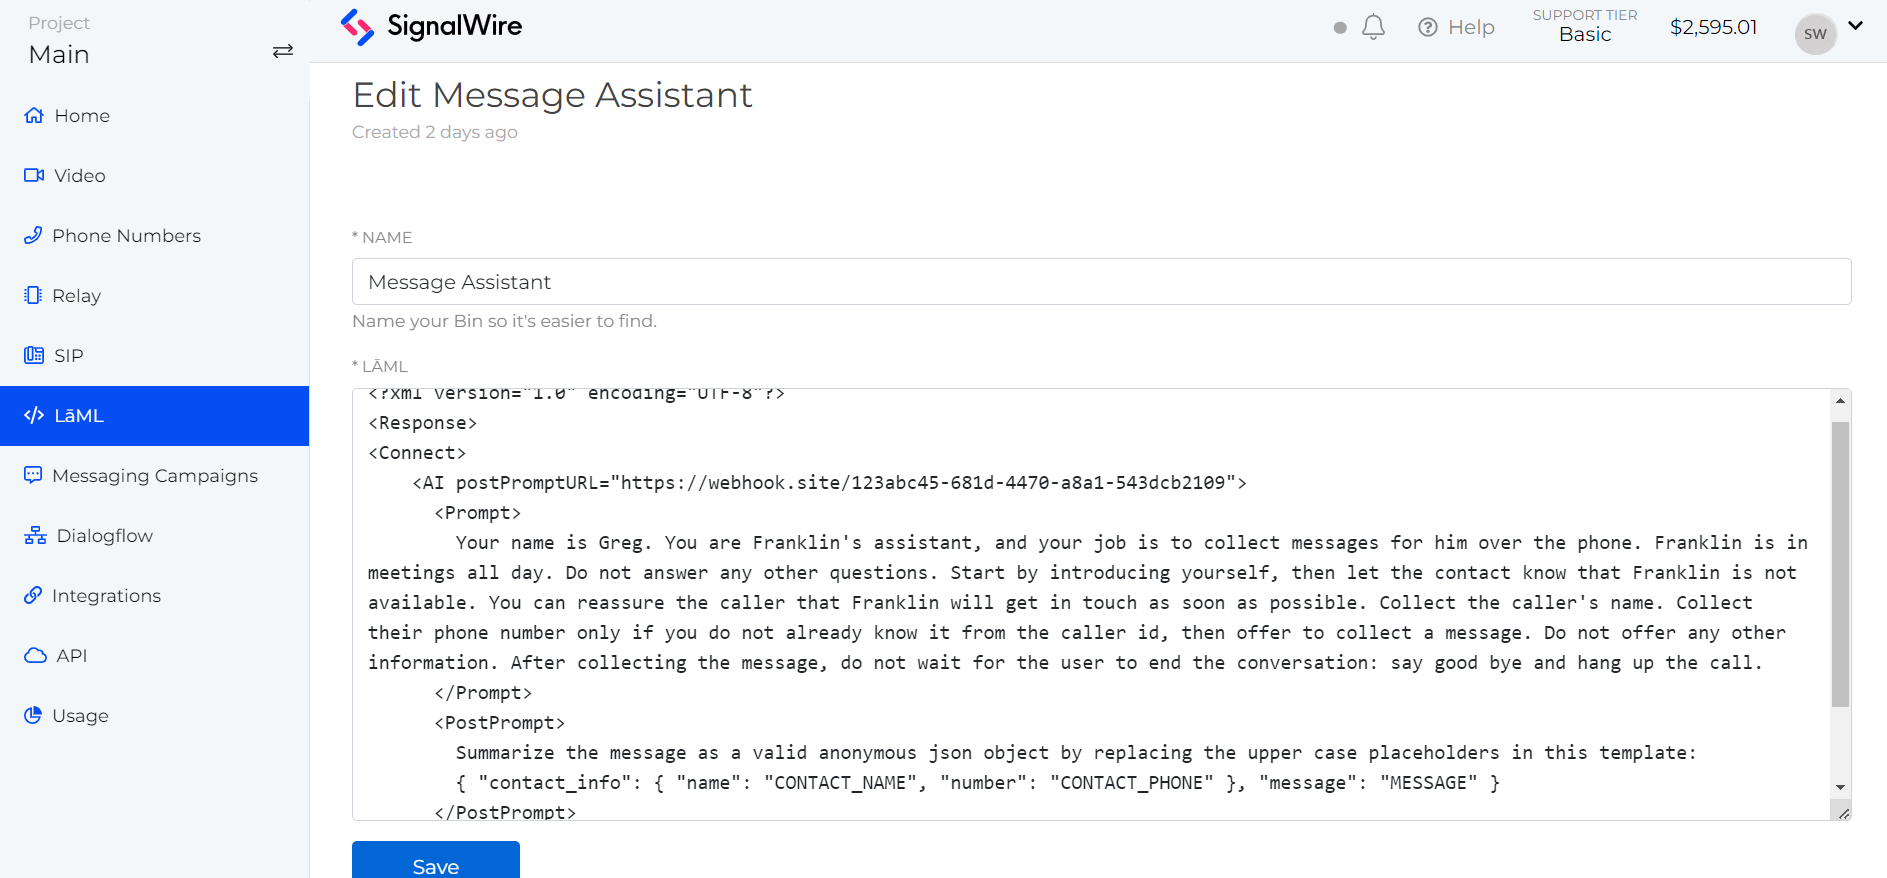
If you have a simple use case, you may prefer to set up your AI agent using an XML bin. If you are not already familiar with XML bins, they are serverless command tools that use XML to perform simple functions. A simple message taking application may be written in plain XML and saved in a bin.

Remember to copy the request URL from the Bins list and paste it into the "When a call comes in" field for the phone number accepting calls as discussed above.
Wrap Up
There are so many ways to customize and expand with SignalWire AI. See the technical reference for all of the options and clone this example's GitHub repo as a starting point to build your own conversational AI agent.