FusionPBX
FusionPBX is a FreeSWITCH-based multi-tenant PBX that provides a robust set of features for business phone systems. Using SignalWire services with FusionPBX allows you to leverage our high call quality and low rates.
Creating a SIP Endpoint
If you don't have a SIP endpoint set up already, the first step is to create a SIP Endpoint and connect it to a phone number.
FusionPBX GUI Set Up
From your FusionPBX installation's web GUI go to Accounts > Gateways.
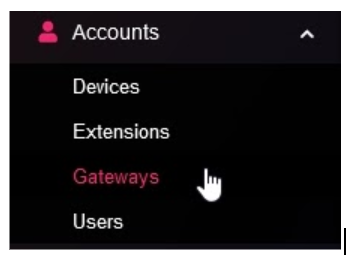
This is where you will use the credentials you created in the first step. Once you are in the Gateways section, click the ADD button in the top right corner.

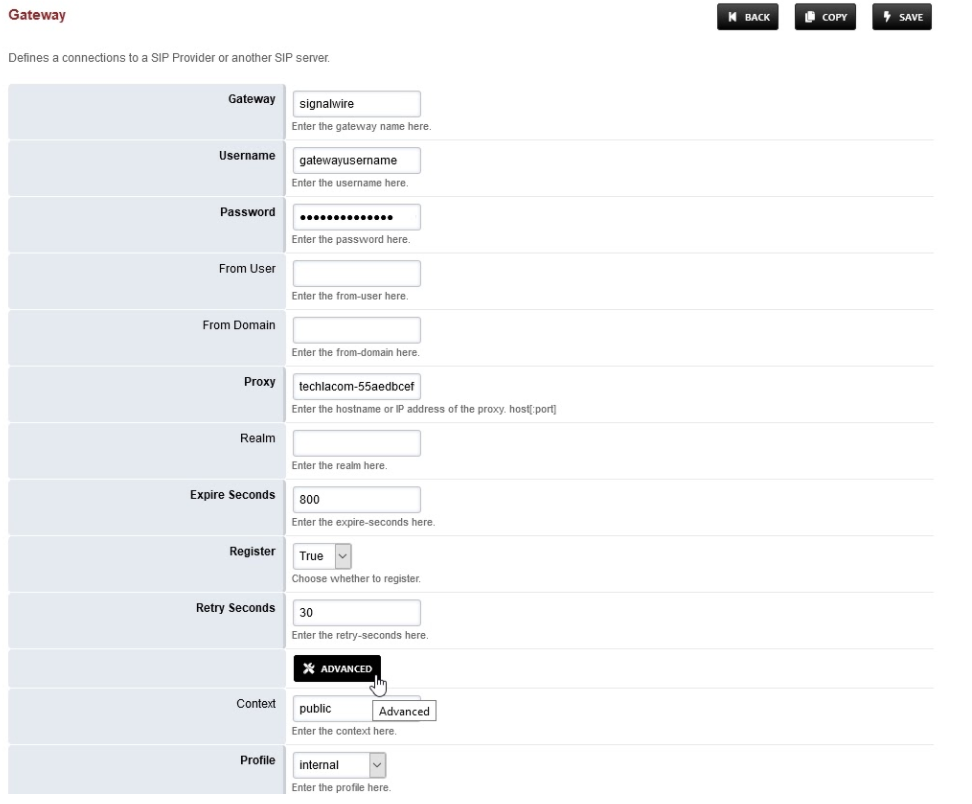
Enter the following information in the Gateway form:
Gateway: This is a label. In this example we will define this as signalwire
Username: Your username as created in the SIP endpoint on SignalWire
Password: The password you set above
Proxy: YOURSPACE-SIPDOMAIN.sip.signalwire.com (Replace with your proxy address)
Register: True
The Proxy address and other SIP credentials can be found in the SignalWire dashboard by going to the SIP > SIP Settings tab as shown below.

Click the Advanced button to expand additional settings
- Register Transport: TLS (This can also be TCP but is better to be secure with TLS)
- Ping: 90
- Profile: internal
- Enabled: True Click save at the top right corner.
Your form should look similar to the following.
In order to use TLS on your FusionPBX installation, you must have SSL certificates like Let's Encrypt or others configured. You can find this detailed further in the FusionPBX member documentation.
You should now have a gateway registered(REGED) as shown in the image below! If you don't see it yet, try clicking Start.

Making Outbound Calls over SignalWire
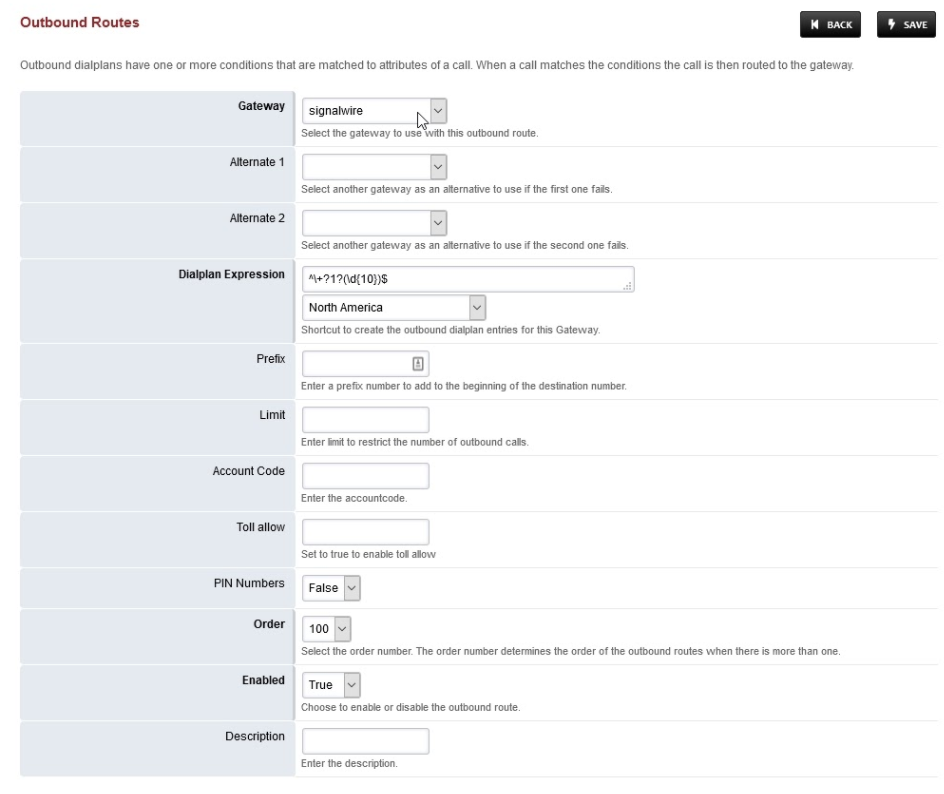
After the gateway is configured in your FusionPBX installation and registered, we can now configure an outbound route! Go to Dialplan > Outbound Routes and click the ADD button at the top right.


Fill in the form with a few simple settings:
- Gateway: Select signalwire from the drop down list
- Dialplan Expression: Choose North America (This can be typed in manually or you can pick other areas also)
Check your form is similar to the following, and click Save.
Recieving Inbound Calls over SignalWire
Go to Accounts > Extensions. Here you can create an extension. This is needed to point your registered peer to so you can receive calls.
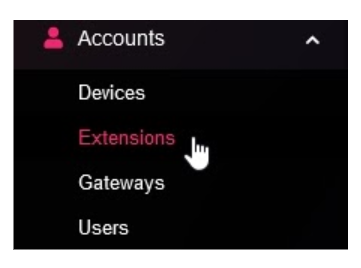
Create an extension by clicking the Add button at the top right. In this example, we will create extension 900 and click Save at the top right.
Go to Dialplan > Destinations from your FusionPBX installation. We will now create an inbound route to connect the SignalWire peer and the extension you just created.

Create a destination by clicking the +ADD button at the top right.

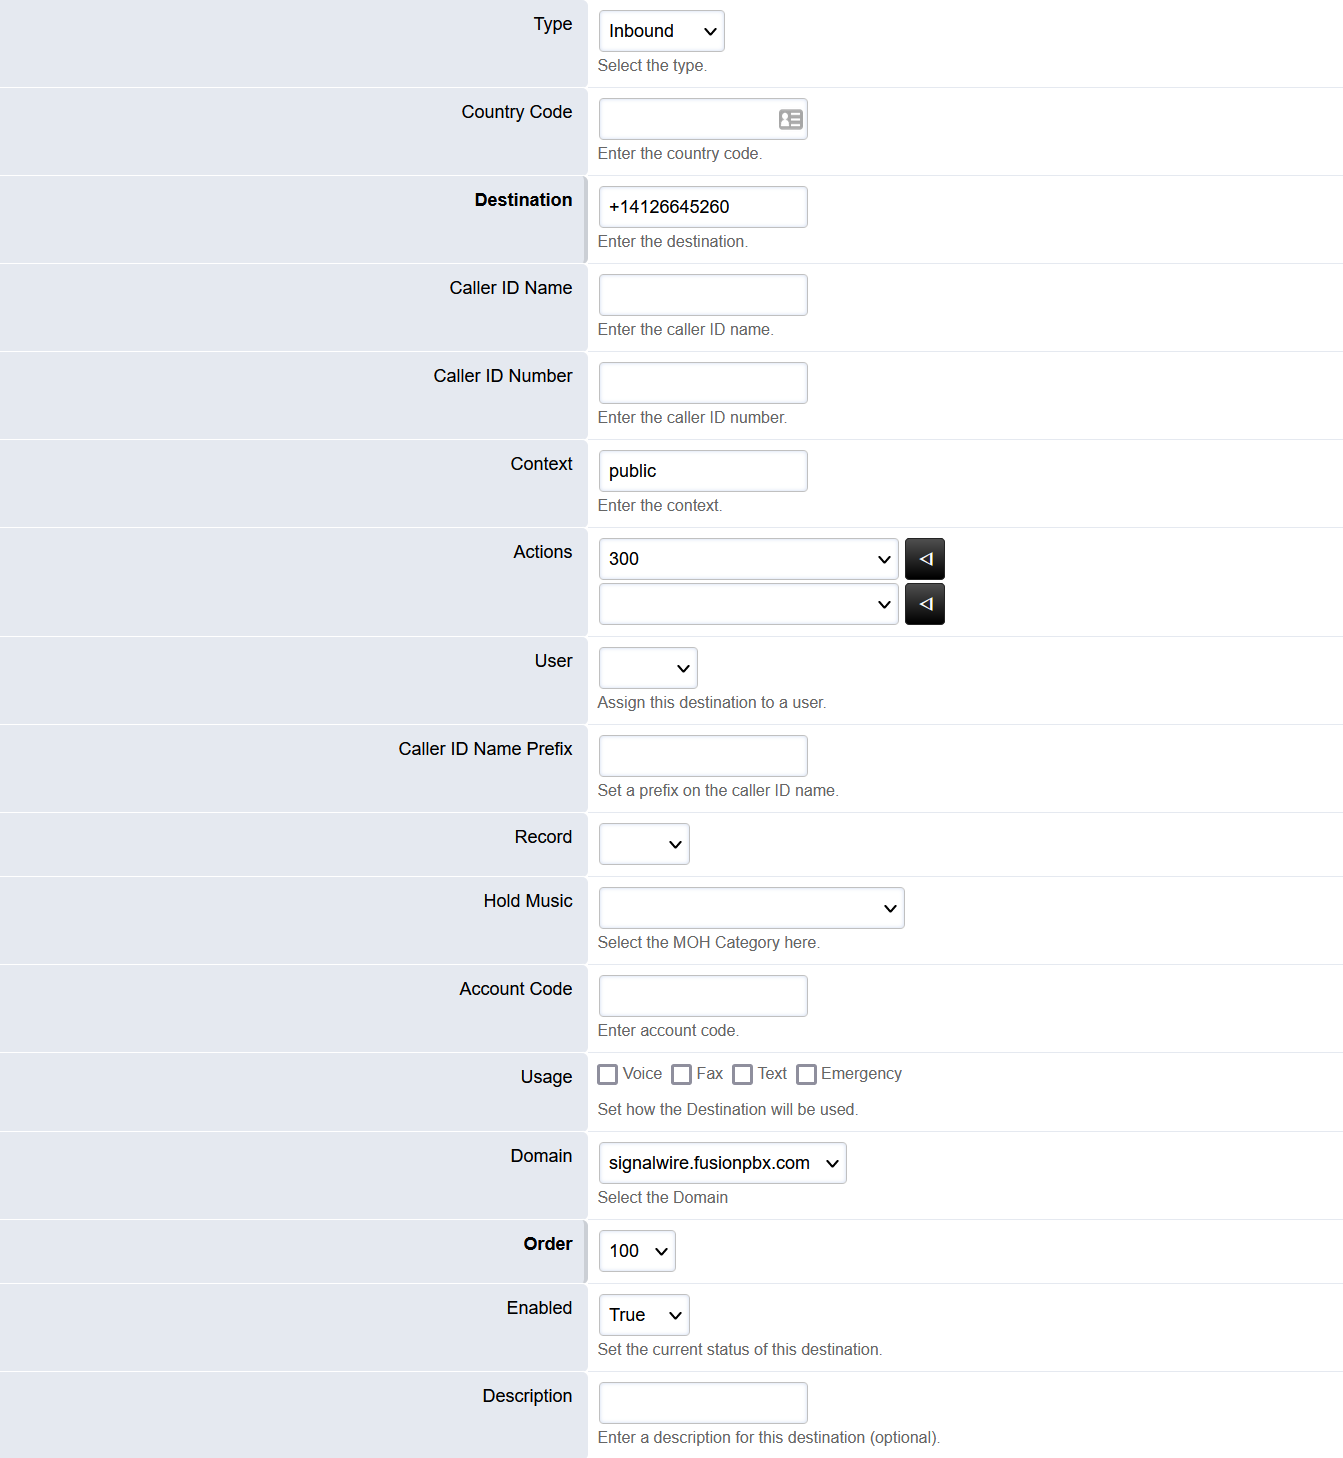
Fill in the form with the necessary information
- Destination: Your SignalWire phone number, with the +1 (eg. +15556677888)
- Caller ID Name: This is optional (also see the documentation for Caller ID settings on SignalWire)
- Caller ID Number: This is optional
- Actions: 900 (This is where the call will go to). The actions can be an extension, IVR, Time condition, etc.
Click the Save button at the top right, after checking your form looks similar to the following.
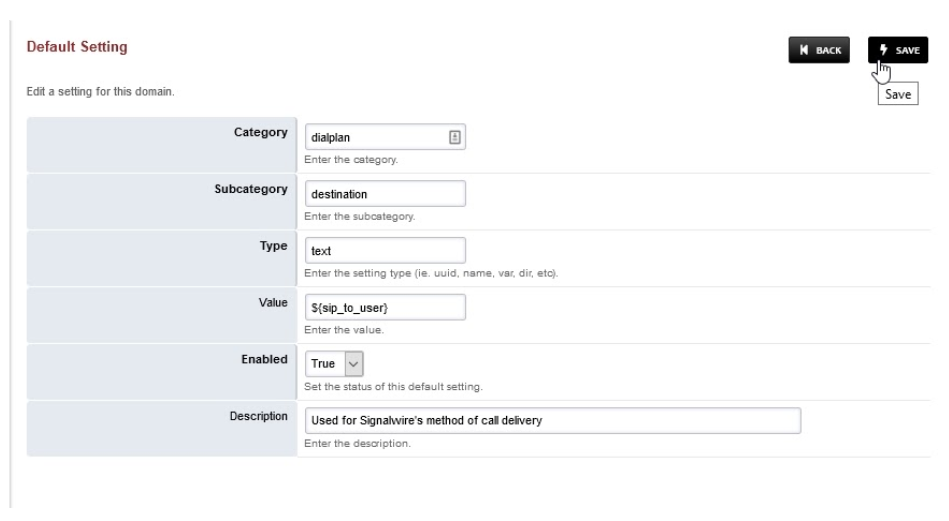
This next step is VERY important. This must be set in order to receive calls to your FusionPBX installation. In the menu, look for Advanced > Default Settings and click the Add button on the top right.

In the form, enter the following information:
- Category: dialplan
- Subcategory: destination
- Type: text
- Value:
${sip_to_user} - Enabled: True
- Description: optional
Check the form looks similar to the following, then click Save. After saving, click the top right Reload button.
Access Control
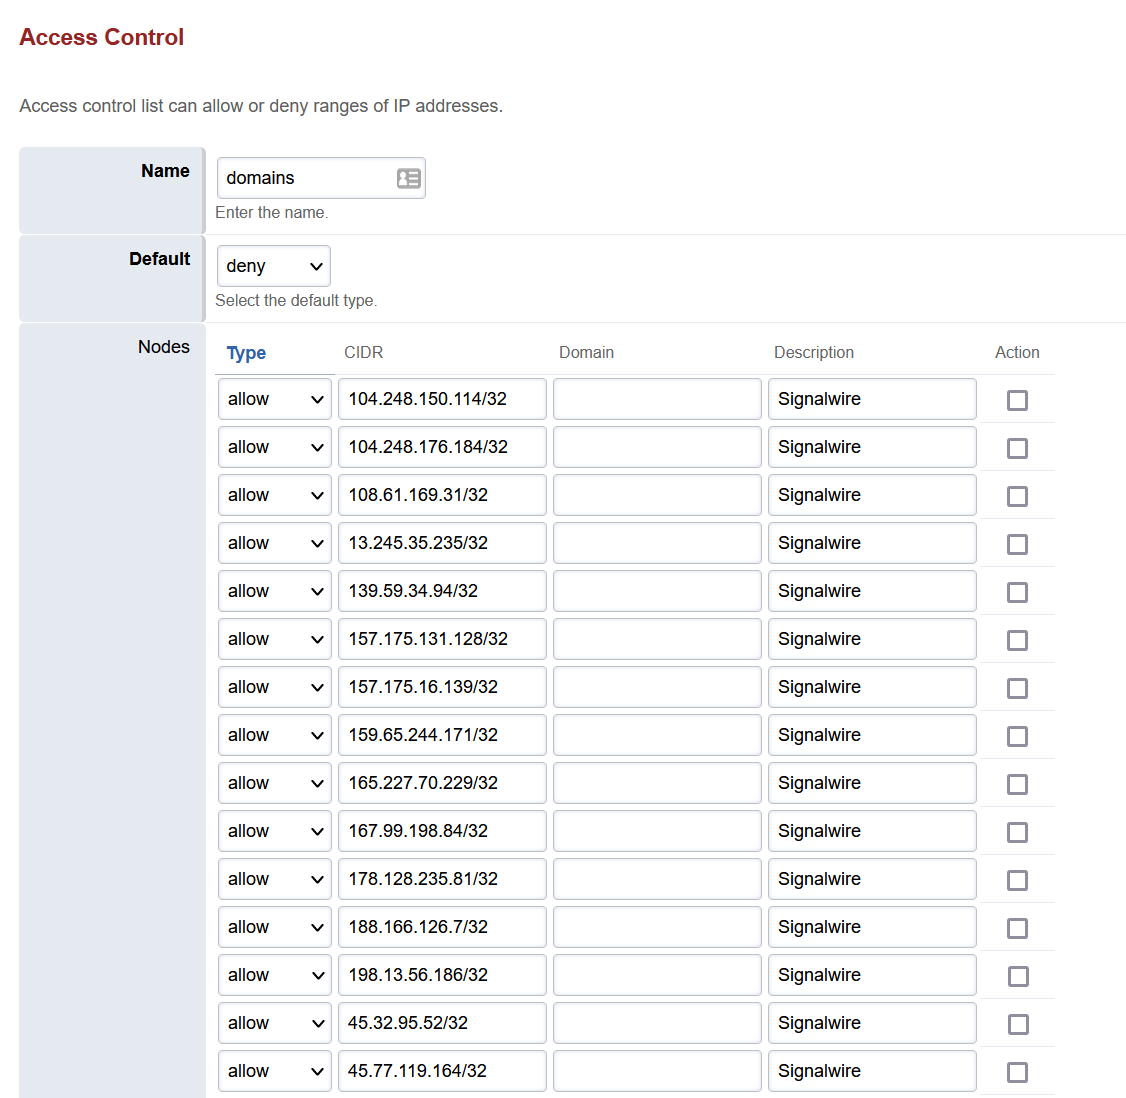
The IPs are needed to make/receive calls, but they can change frequently. You can find the IPs by querying sip.signalwire.com. CIDR is used so IPs must be added with a x.x.x.x/32.
Windows
nslookup sip.signalwire.com
Mac/linux
dig sip.signalwire.com
You can add these in Advanced --> Access Controls --> Domains.
fail2ban
If you are using fail2ban to protect freeSWITCH, you can add SignalWire IPs directly to iptables via the linux command line!
Check out our article on how to allow SignalWire IPs through your firewall to learn more.