Forwarding Inbound Faxes to Email
This short and simple guide will show how you can use the SignalWire Python SDK and the MailGun API in order to forward your incoming SignalWire faxes to email. You can easily bridge this older technology by allowing faxes to be delivered to your inbox with only a few lines of code.
What do I need to run this code?
How to Run the Application
To run the application, execute export FLASK_APP=app.py then run flask run.
You may need to use an SSH tunnel for testing this code if running on your local machine. – we recommend ngrok. You can learn more about how to use ngrok with SignalWire here.
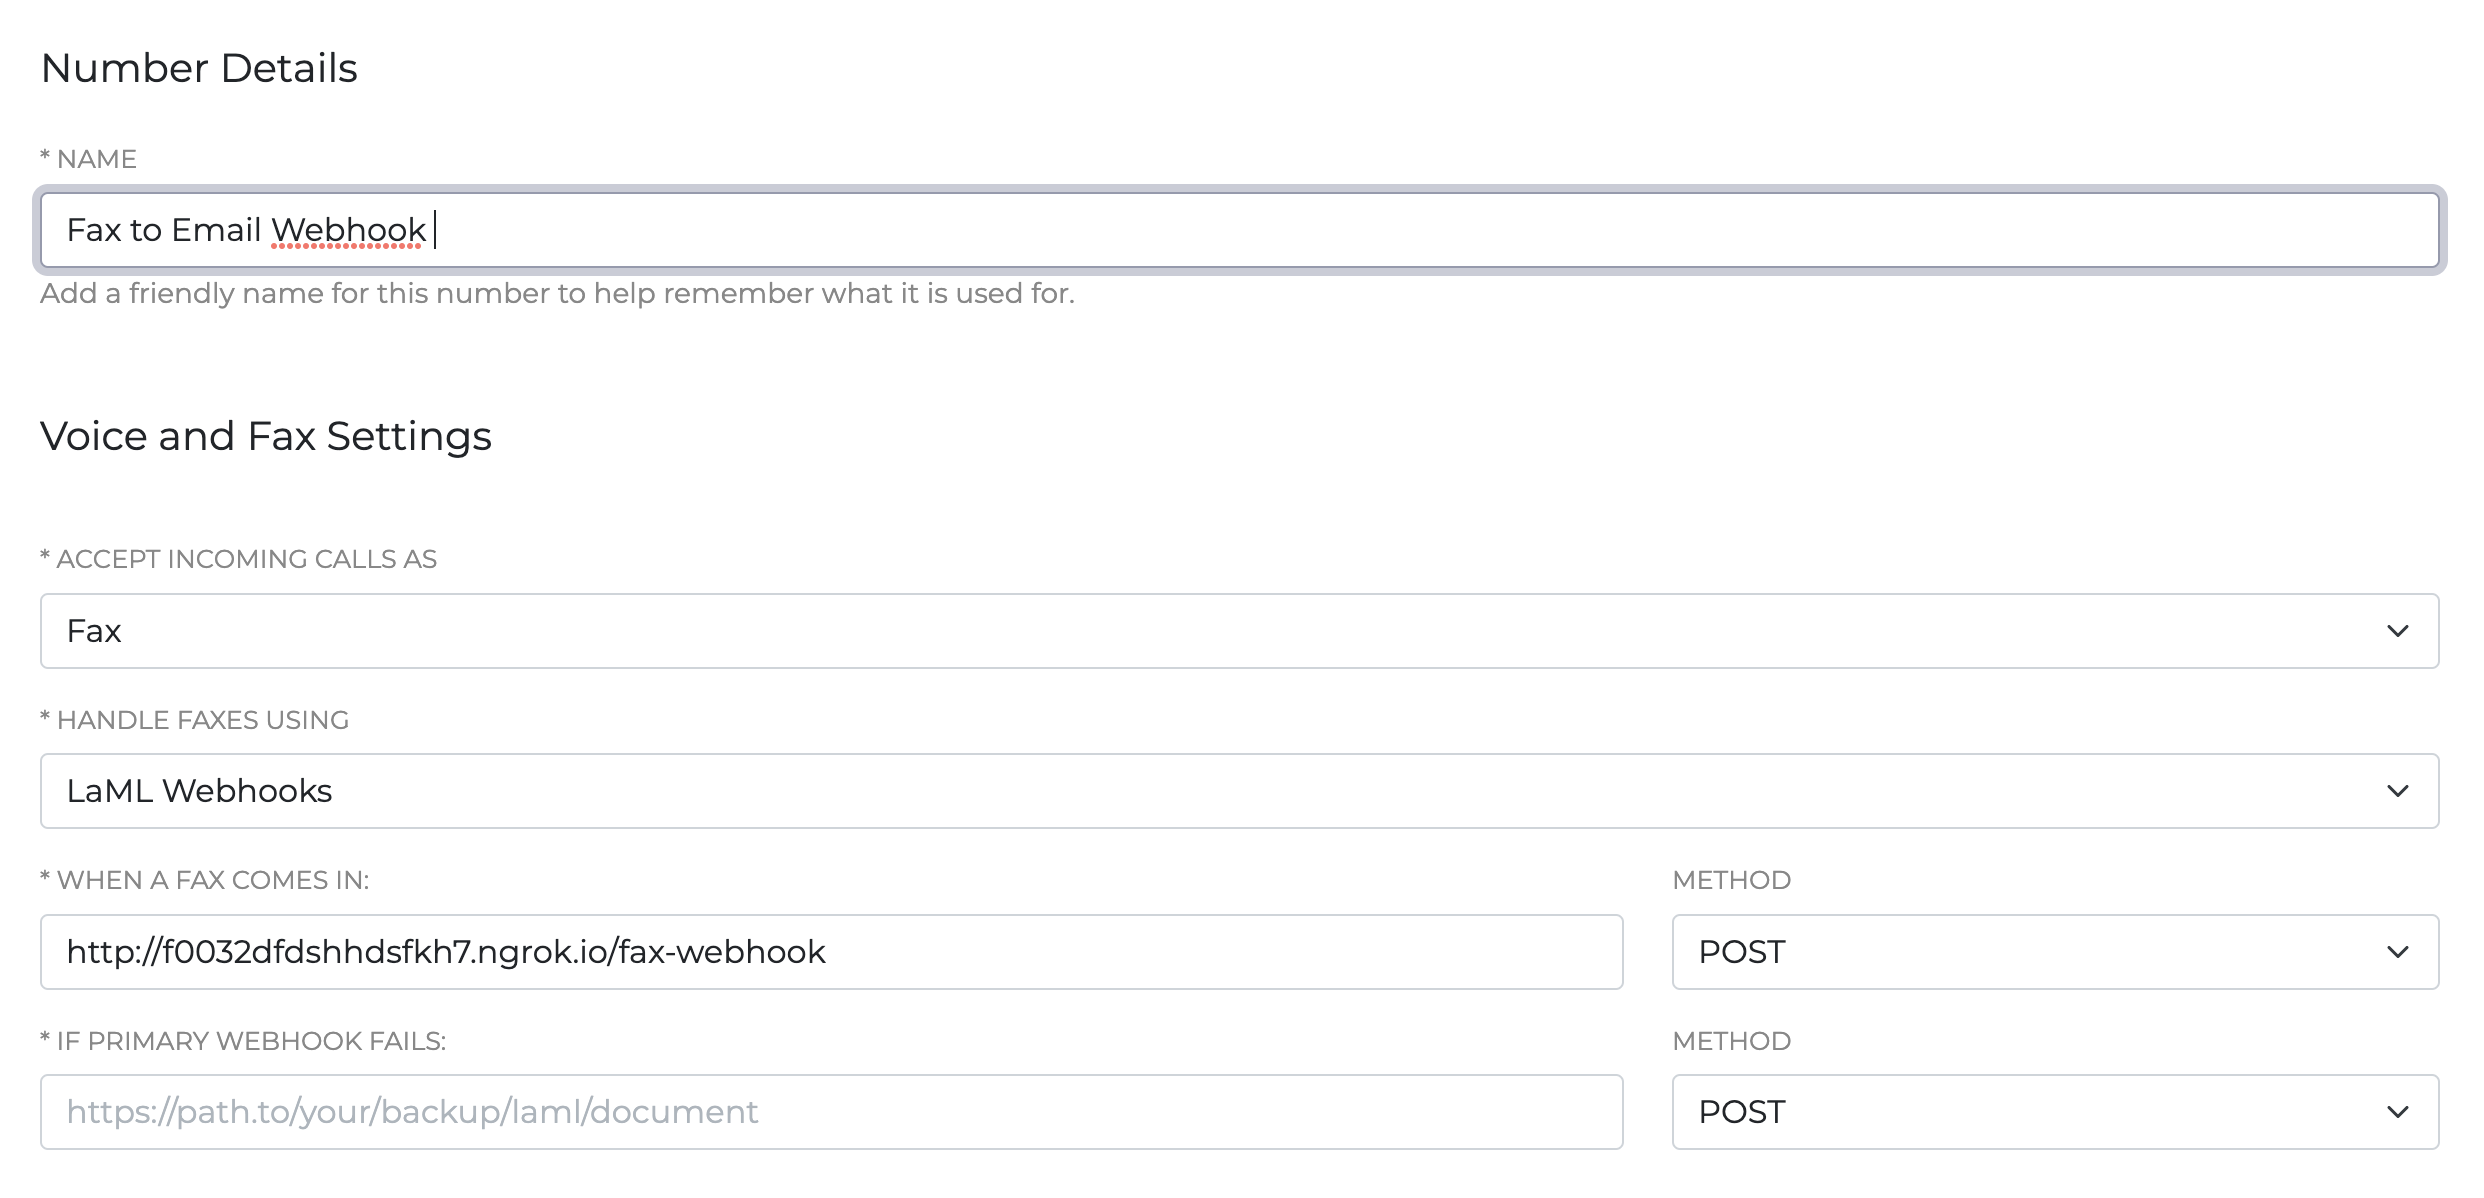
To use this Script, you need to expose it to the web (either through ngrok or by hosting it on a server) and use it as a webhook for handling incoming calls under phone number settings. For example, this is what it looks like if you use an ngrok tunnel to the script. For this script, you would use the given ngrok URL and the /fax-webhook route, like this http://f0032dfdshhdsfkh7.ngrok.io/fax-webhook

Step by Step Code Walkthrough
Configuring Your Environment File
- Copy from example.env and fill in your values
- Save new file called .env
Your file should look something like this
## This is the full name of your SignalWire Space. e.g.: example.signalwire.com
SIGNALWIRE_SPACE=
# Your Project ID - you can find it on the `API` page in your Dashboard.
SIGNALWIRE_PROJECT=
# Your API token - you can generate one on the `API` page in your Dashboard
SIGNALWIRE_TOKEN=
# The phone number you'll be using. Must include the `+1` ,
SIGNALWIRE_NUMBER=
# MailGun domain associated with your MailGun account
MAILGUN_DOMAIN=
# MailGun token associated with your MailGun Account
MAILGUN_API_TOKEN=
# Send Email From Address
EMAIL_FROM=info@yourdomain.com
# Send email To address
EMAIL_TO=youremail@yourdomain.com
# Email subject
EMAIL_SUBJECT=Forward Fax To Email
Configuring the main script
We start with the necessary imports and instantiate a Flask app:
import os
import requests
import pprint
from dotenv import load_dotenv

load_dotenv()
from flask import Flask, request

app = Flask(__name__)
Next, we need to define a function that will use the MailGun API to send the email. You can read more about sending with the MailGun API in their documentation here.
This function is very simple and copied exactly from their documentation - no need to make any difficult changes! Set up the API token, from address, to address, and subject line in your .env file. We will show you how to set that up further down in the guide! The body will be passed in as a variable to the function when an incoming fax is received and the webhook is used.
def send_email(body):
    return requests.post(
        "https://api.mailgun.net/v3/" + os.environ['MAILGUN_DOMAIN'] + "/messages",
        auth=("api", os.environ['MAILGUN_API_TOKEN']),
        data={"from": os.environ['EMAIL_FROM'],
              "to": [os.environ['EMAIL_TO']],
              "subject": os.environ['EMAIL_SUBJECT'],
              "text": body})
We also need to define the route we will be using to accept incoming GET/POST requests. In this route, we will call our send_email function created above with the formatted form data in the fax as the body. We will then return "200" to signify it was successful.
@app.route('/fax-webhook', methods=['POST'])
def fax_webhook():
    send_email(pprint.pformat(request.form, indent=4))
    return "200"
Finally, we run the application:
if __name__ == "__main__":
    app.run()
Wrap Up
This guide demonstrates how easy it can be to forward your faxes to email using the Mailgun API and SignalWire Python SDK allowing for review of faxes from anywhere.
Required Resources:
Sign Up Here
If you would like to test this example out, you can create a SignalWire account and space here.
Please feel free to reach out to us on our Community Slack or create a Support ticket if you need guidance!